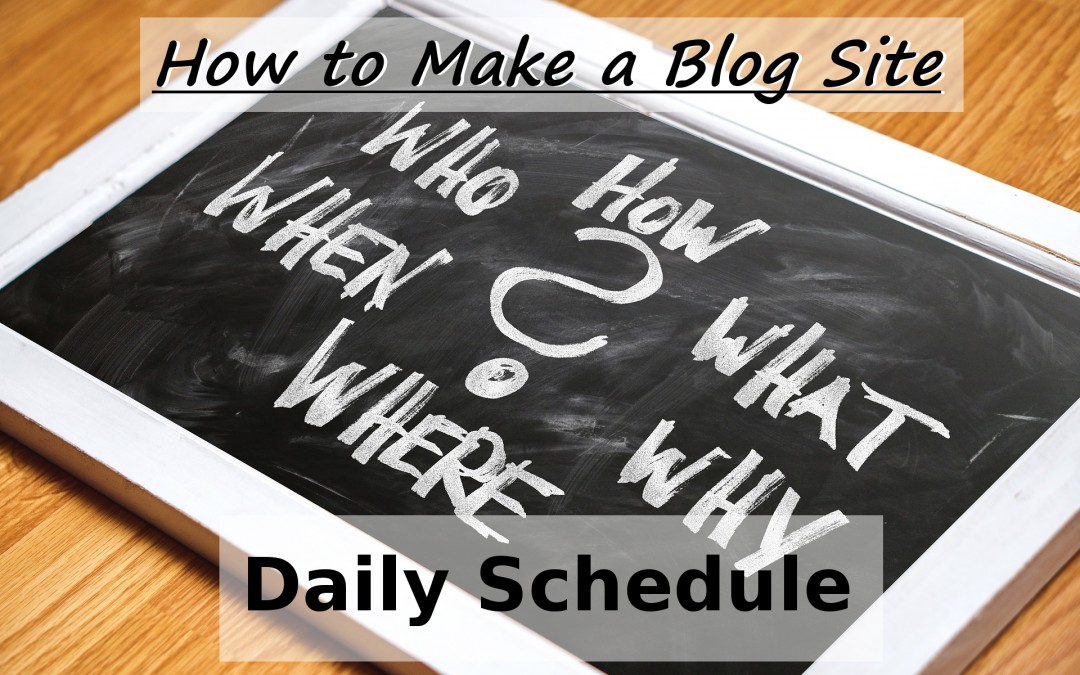
Congratulations!
It is a wise choice to think about the topic of how to make a blog site. A blog site can be anything from being a diary about your life to a distribution channel of the quarterly announced finances of a big corporation. It’s totally and only up to you how you want to approach and proceed.
Having a blog is a huge asset. It can bring you additional revenue as well as unexpected partnership proposal. In addition, people are more than curious to follow matters that interested them.
One of the best parts of blogging is that you can write just the way you like and people still like to read it. If you write honestly and don’t pretend to be something you aren’t, people will notice it and respect you even more.

On the other hand, if you’re trying to blog something if you don’t know that well neither have passion with, people will notice that as well. In that case, your blogging enthusiasm will collapse eventually.
So make sure to start blogging about matters you care and have a passion for.
With that being said, let’s begin our guide of How to Make a Blog Site.
Day #1 - Setup WordPress, choose domain & hosting

It’s the first dawn of a new era. You have just decided to put your own blog together. First of all, you have to figure out which blogging platform to use. That should be an easy task: Choose WordPress. It is the most comprehensive open source content management system online till this date. Sure, you can pick one of the free alternatives such as Blogger or Wix.
Remember in this case that you don’t have the complete power of your new blog if choosing a free platform. Even though it might be a rare occasion, Google or Wix can shut down your site whenever they so desire. They can explain it by “violating terms and condition”. You don’t come across that with self-hosted WordPress - blog.
So I recommend you to stick with WordPress - platform.
Domain

Furthermore, you have to pick a domain name and web hosting. I personally bought my domain FlowingFirm.com from Godaddy.com. That is perhaps the most straightforward way to get a domain name. Another choice for getting a domain name is to go NameCheap.com.
If it’s an easy task to grab a domain name, it might not be as quick to decide the domain name itself. I twiddled around several names in my mind before deciding to pick one. If you don’t have the name of your new site decided yet, spend a couple of minutes (or more if needed) thinking about it. Just write down few good choices and then spin them around.
You can get some domain name suggestions from DomainIt.com.
Hosting
Picking a right hosting can be a pain in the bottom if not having any clue at the first place. I use InMotion Hosting with all my sites. Their resell package allows me to sell hosting space straight to my clients. I’ve designed countless of websites during my career so having an own server has allowed me to build a passive income stream solely on selling hosting.
Nonetheless, I suggest you choose the hosting for your new blog from Bluehost. It offers a helpful one click WordPress installation which comes handy very soon. Just grab one of the affordable packets offered from the beginning. There is no need to pay extra for something fancy at this point.

Installing WordPress
Like I stated in the previous section if you pick one of the best choices for hosting, such as Bluehost, installing WordPress is easy. You’ll just click one button inside the hosting provider cPanel and you’re good to go.
Nevertheless, if you decide you choose some other solution for hosting, no worries. It’s really easy to just install WordPress in that case too. You’ll just acquire the cPanel login details from the hosting provider, download an FTP-software (for instance FileZilla), and upload the newest WordPress-files you have gotten from WordPress.org to the public_html - folder of your server.
Getting the files to the server
After getting the files to the server, you have to just visit this URL www.yourdomain.com/wp-admin/install.php (change yourdomain.com with the domain you chose earlier during this day) and follow the given instructions.

You will have to create MySQL-database and user during this process, though, so make sure your hosting provider offers these. Bluehost and Inmotion Hosting do. After adding these details and determining username and password for the WordPress admin panel, you have successfully installed WordPress.
Wow, I think doing these tasks will do just fine for the Day 1 of How to Make a Blog Site. Now, it’s a wonderful time to relax for one night and come back tomorrow for Day 2. You will learn what theme to choose and plugins to use on your brand new WordPress - blog tomorrow.
Day #2 - Choosing a theme and adding right plugins
On Day 2 of How to Make a Blog Site, you will learn to choose a theme for your new WordPress - blog. In addition, we will take a close look what kind of plugins you should add to your blog in order to help it run more efficiently.
Without further ado, let’s jump into choosing a theme for your brand new blog.
Choosing a Free Theme

There are a couple of different choices when picking a new theme for a WordPress - blog. You can find a suitable one from thousands of free WordPress themes. Just do a quick googling by typing keywords, for example, “free WordPress theme for blog site”, and there you go.
It actually doesn’t matter too much what theme you choose to start with. You can always change it later when you have found your own style of blogging. Furthermore, you might develop an own brand with certain colors as well helping you to determine the overall look of your site.
Moreover, another way to find free themes is to go to your brand new WordPress dashboard and click Themes inside Appearance - tab. Then click ‘Add New Theme’ which leads you to the page where you can find over 2500 different free themes. I’m sure you will be able to discover the one for your site from that amount, won’t you?
If you pick a theme inside WordPress - dashboard, installing a theme is an easy peasy. Just choose a theme and click blue ‘Install’ - button. It does not get any easier than that.
Whereas if you download a theme outside of WordPress - dashboard, you’ll have two choices to install a theme: You can use FTP-software again or upload the theme via WordPress - dashboard.
How to upload a theme into the blog?
Using an FTP-program is not a problem anymore since you already have downloaded FileZilla on Day 1. Just extract the zip file to your computer, locate Themes - folder inside the server from ‘public_html/wp-content/ - path, and upload theme folder there.
Uploading theme via WordPress - dashboard is even easier. When reaching Add Themes - page (just like we talked about above), instead of browsing a new theme, click ‘Upload Theme’ - button upper side of the page. Then push ‘Choose File’ and locate the zip file from your computer.
If everything went correctly, you should have a new theme installed after clicking ‘Install Now’ - button.
Finding a Paid Theme

If you are not satisfied for the supply of free WordPress themes, don’t worry. You can always pay a couple of tens of dollars in order to get a more powerful and better-looking theme. There are plenty of providers out there such as TemplateMonster or Elegant Themes.
If you have few spare dollars at the beginning, you should invest in paid theme. It will give your blog more professional look compared to free themes. In addition, you have more possibilities to customize it in the future when your blogging skills have enhanced better and better.
Sure, you can upgrade a free theme to a paid one when you begin to earn money online. Just remember that it will take time, require plenty of writing, and you cannot give up at any point.
Let’s take a look next what kind of plugins you should install after getting a suitable theme for the blog…
Getting Right Plugins
A WordPress plugin is a way to make your blog more functional and comprehensive. There are a couple of vital plugins you should install immediately after getting your blog setup and the theme picked up.

Every WordPress blog should use these free plugins listed below at the beginning:
- Akismet - prevent comment spamming since nobody likes spam
- Yoast SEO - all-in-one SEO solution with in-page content analysis and XML sitemaps and more
- Google Analytics Dashboard for WP - installs Google Analytics tracking code enabling you to see the blog visitor details straight from the WordPress dashboard
- Contact Form 7 - an easy way for the site visitor to contact you
- WP Total Cache - improve the speed and user experience of your site
- SumoMe - automates your site growth with social shares and list building
- iThemes Security - an easy-to-use WordPress security plugin
With these free plugins your brand new site will work better, faster, and more secure. All in all, the site have a chance to reach more audience with social aspect in the mind, too.
Spend an hour or so for installing all these free plugins. Trust me, you will save yourself for countless of headaches in the future.
That’s all for Day 2 of How to Make a Blog Site. On Day 3 it is time to start blogging!
Day #3 - Content writing begins
Finally, the exciting part of How to Make a Blog Site starts on Day 3. Since blogging equals writing, it’s very important to get it going as soon as possible.

You must aim to write every day in the beginning at least for a month. In that way, you will get more comfortable with writing. At the same time, you’ll generate a new, creative habit for yourself.
It doesn’t matter too much what kind of text you are producing at first. Like said, the most important thing is to get familiar with writing. You should concentrate on typing at least 30 uninterrupted minutes per day, preferably an hour.
Just stick with your chosen theme in your texts and try to write 500-word articles. Your first post can be an introductory article about yourself or the blog. Furthermore, you can jump straight to the point if you desire so.
Fine-tuning the blog at the same time
After writing your first blog post, previewing it and publishing it to the world, you might want to take a look at some errors and mistakes, too. Nobody is perfect, least when learning to do something new.
You should take a close look at the format of the blog. There might be some errors with colors, phrasing, or anything else.
Welcome to the world of the internet!

If you come across insurmountable problems, just turn to Google. There is a huge chance that someone else has had the same exact question answered.
Anyway, if everything seems to be in good order after publishing your first post, feel free to take a break and come back tomorrow on Day 4 of How to Make a Blog Site.
Day #4 - Establishing the social aspect

During the Day 4, it is time to get more social. That means you are going to create social media visibility from the biggest sites out there. It is possible to skyrocket a new blog site just on social media traffic. You should not take it lightly.
Every time you’re writing a blog post (like you should do every day in the beginning), you should share it via your social media accounts. In addition, you might want to share some beautiful pictures and wise thoughts about your theme with your new followers.
There are three social media networks I recommend you to join on Day 4 of How to Make a Blog Site. After you have written the article of the day, you should create accounts to Facebook, Twitter, and Instagram.
Let’s start the process from the most well-known one, Facebook.
Facebook has almost two billion monthly users from teenagers to retirees worldwide. Since it has become a huge part of our current lifestyle, you might already have your own Facebook account done. That would be helpful since if you are creating a Facebook fan page for your blog, you must first have a personal Facebook account.
Just visit Facebook.com, fill out your personal information, and click ‘Create an account’ - button.
After getting the Facebook - account, you will be able to create a fan page for your blog. You can easily stay in touch with your followers through the fan page. Moreover, it allows you to create an audience base for your articles. That helps your blog site to grow.

Choose Brand or Product for your blog
There are 328 million active Twitter users on 2017. It’s crucial to share links to your blog posts with the service. Twitter is a platform for sharing short messages to the world - in other words - microblogging.
You can create a Twitter account by visiting their website Twitter.com and following the instructions. If you don’t need a personal account, you can create instantly account for your blog.
When beginning to use Twitter, start by following dozens of theme-related Twitter accounts. In addition, you can share links to your blog posts and other interesting related material found online.

Instagram is an image sharing social network owned by Facebook. It has currently 700 million active monthly users and the amount is growing all the time. It’s not necessarily the easiest way to connect a blog with Instagram.
It is as easy to create an Instagram account as the case is with Facebook and Twitter. Just click yourself to Instagram.com - front page and follow instructions there. It is up to you whether you want to first create a personal account or straight one for your blog.
Remember that you can create more than one account and connect them together. With one click you can switch from one account to another.
Another thing to remember with Instagram is that its use is heavily linked with your smart phone. Unlike when using Facebook and Twitter, you cannot post images using the web browser.
Nonetheless, it’s a wonderful tool for sharing pictures related to your blog. In addition, you can raise the knowledge your website even though it’s not possible to link straight to the blog.
Day #5 - Branding
On Day 5 your new blogging website is already having a nice outfit. If you have followed our guide of How to Make a Blog Site - Daily Schedule, you should have a beautiful WordPress theme installed on your chosen hosting with a catchy domain. You have also created some content for the blog making it possible to gather visitors.
Having said that, we are going to improve the site towards even more professional direction during this day. The key for that is a logo.
A logo gives your blog site a virtual face. You can use the logo for all the marketing efforts as well as your newly created social media accounts. Furthermore, it brands the site in the eyes of your visitors and makes your site memorable.
Without further ado, let’s jump into Day 5 of How to Make a Blog Site!

First of all, if you already have some graphic knowledge, you can try to design a logo by yourself. There are some helpful software programs on the internet which you might want to take a look.
For example, The Logo Creator is one of the most comprehensive ones out there. Their style is kind of cartoonish so if that’s something you don’t want, you can take a look other sources for logo creating. The Logo Creator costs $37 but at the moment it is on sale for only $20!
Fiverr.com as a great option
Another affordable solution for designing a logo for your new blog is Fiverr.com. You can get almost anything internet-related through their service. And the best part is that it that you have to pay only $5 for it. Obviously, you will find hundreds and hundreds of logo creators on Fiverr.com.
Fiverr is most recommend service for the beginners due to its cost-effectiveness.
If both ways presented above not work for you, you might want to head over to 99designs.com. It is more expensive service than the choices above. Their pricing begins from $299 and the results are definitely worth every penny. If you need to keep expenses down at the beginning, it might not be the correct platform for you.
After getting your logo done, you will just upload it to your WordPress dashboard. Usually, there are clear instructions for doing this within the chosen theme. In addition, you can use the new logo as a Favicon, too (tiny little icon in the browser bar).
That’s all for Day 5 of How to Make a Blog Site!
You might call it for a weekend at this point! Obviously, enthusiastic bloggers will work a couple of hours during the weekend as well 🙂
Days 6-30 - Writing blog posts every day

Well done!
Your blog has now very professional outlook and ready to go viral! You should aim to write interesting posts every day from Day 6 to at least Day 30. It is possible to ease off a bit after one month and adjust the schedule of writing for every other day or so.
Why is it important to write every day at the beginning then?
The simple answer is: To create a habit. Share on XIf you’re not dedicated to writing blog posts, you might give up after a couple of days or weeks. That’s why it is vital to set realistic goals. Writing a short 300-500 words per day should be an achievable target for anyone interested in blogging.
After approximately three weeks you’ll begin to notice that writing becomes naturally from you. You actually look forward to writing something worthwhile into your blog. If you can reach some audience at the same time, that boosts your energy even more!
Just keep writing and publishing content through your blog and remember to link that content to your social media accounts, too.
Remember to keep your blog in order all the time

Keep your blog in order
While you are typing fresh content day after day, you should try to locate possible errors from your blog at the same time.
Trust me, there are always some parts needing fixing when maintaining website online.
Luckily, those things are usually easily and quickly done with a help of Google.
Nonetheless, if you come across unsolvable matters, you can always find professional help. For instance, Upwork.com is a wonderful place for finding freelancers
Be aware, though, you have to pay money in exchange for the service. Most often you should expect to pay a few dozen dollars for the freelancer.
Conclusion of How to Make a Blog Site
After one month of writing blog posts, you should have a content-rich blog running full-steam ahead. You might have also gotten first blog comments or social media shares at this point.
If so, pick up the energy from those actions and keep going further.
If not, keep posting content day after day and you’ll eventually reach people.
Nonetheless, keeping a blog is not all about getting people to read your content. As a matter of fact, it should be vice versa!
Writing blog posts is actually good for you in the first place. Share on XWhat do I mean by that?
- You have proved to yourself that you’ve got the needed discipline to build something permanent.
- You have shown to yourself that you can be an entrepreneur if you so desire.
- You have the attitude to build an internet business.
- You can be free!
What would be a better feeling than to notice a simple blog can bring you all the listed matters above. I honestly don’t know!

Now, after getting the mindset right, keep your working pants on and push forward. When you come across difficult times, keep a short break and remind yourself why you began to think how to make a blog site.
Everybody has their own reasons. I’ve my own and so do you. My reason is to be free to choose whatever I want to do and achieve in my life.
What’s yours?
More articles / Lisää artikkeleita:
 The 30 Day Meditation Challenge - Complete!
 Five Recommended Blogs for Your Pleasure
 7 Indispensable Free Smartphone Apps for Daily Productivity
 Four Self-Help Books That Will Change Your Life
 3 Tips for Finding Location Independent Job Opportunities
 The Help of Our Families in Location Independence
 Our Six Month’s Travel Budget in Southeast Asia
 Hello!
My name is Mikko Raespuro and I am a Finnish location independent entrepreneur in my thirties. Welcome to the Flowing Firm – blog (blog name comes playfully from running a location independent business)!
Hello!
My name is Mikko Raespuro and I am a Finnish location independent entrepreneur in my thirties. Welcome to the Flowing Firm – blog (blog name comes playfully from running a location independent business)!